For iFreeTools CRM, we have added the geo-location features to all records which have address values. So, you could now store and search for Leads, Contacts, Accounts and Vendors based on geo-location criteria and view them in a map view based on Google Maps.
iFreeTools Creator, which is our online app builder, also supports the geo-location features.
In this blog post, we will walk-through the steps in creating a simple store locator type application using iFreeTools Creator, to showcase the geo-location and Google Maps integration features.
We will also upload a sample CSV file, reusing a CSV file from Google's tutorial on building a similar store locator type app (that tutorial, by the way, details about building such an app using PHP and MySQL).
The overall steps involved are as given below..
- Login into iFreeTools Creator.
- Edit App Settings to change the time-zone and branding. (optional)
- Create Entity (or "table") to represent Stores.
- Create Attributes (or "fields"/"columns") for the Entity.
- Start using the app.
- Uploading data from sample CSV file. (optional)
- Create custom views to filter based on geo-location . (optional)
- Uploading data from sample CSV file. (optional)
Step 1 : Login into iFreeTools Creator
This is simple. No sign-up forms. Just login using your Google user account or your Google Apps user account into iFreeTools Creator.Step 2 : Edit App Settings to change the time-zone and branding. (optional)
You can re-brand & customize your app from under Admin > App Settings, providing your time-zone and also change the app names from their defaults. The below image shows the changes I have made : choosing PST8PDT as the time-zone and changing the app name to Store Locator.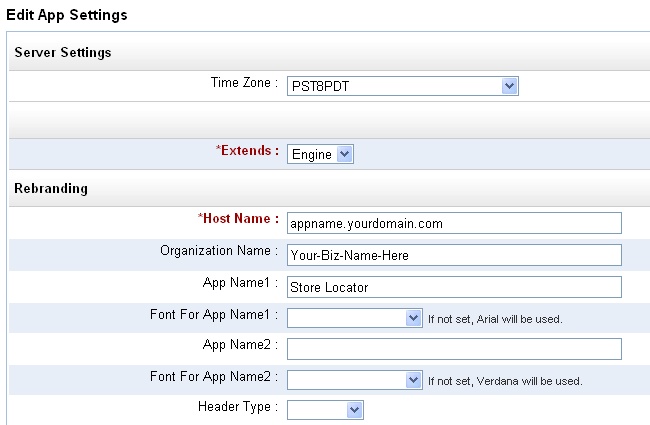
Step 3 : Create Entity (or "table") to represent Stores
Proceed to Admin > Entities > Add Entity and provide details of the entity which will hold our data. Let us call the entity Restaurant..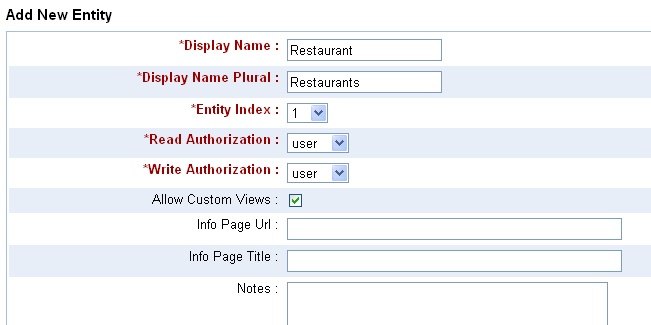
Step 4 : Create Attributes (or "fields"/"columns") for the Entity
Once you add the entity, you can then add the attributes for that entity - either from the Entity details page, which you get after completing step 3 or from Admin > Attributes > More Actions > Add multiple Attributes to add them in one shot. For our demo we will use 3 attributes Name, Address and Address on Map, the first 2 being string (or text input fields) while the 3rd is a GeoPoint, which enables us to refer to a specific location on a map and store that value in the database.. The Property Index helps in specifying the order of the attributes. Name comes first, followed by Address and 3rd is Address on Map.
Step 5 : Start using the app
That is it !!You could just start using the app, adding restaurant entries using the automatically generated form, as shown below..

Step 5.1 : Uploading data from sample CSV file. (optional)
We will now try to upload a sample CSV file. Save this sample CSV file to your disk and edit it to add the column headers, which for this CSV file are..Name,Address,Latitude,Longitude
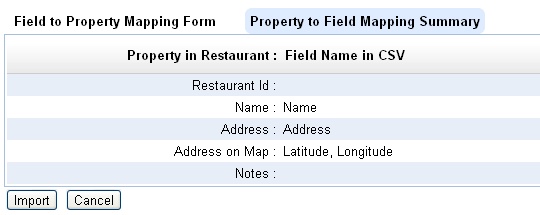
Now proceed to import this CSV file from Restaurants > More Actions > Import from CSV and provide the CSV file and proceed to mapping of fields. The initial mapping will be something like given below..
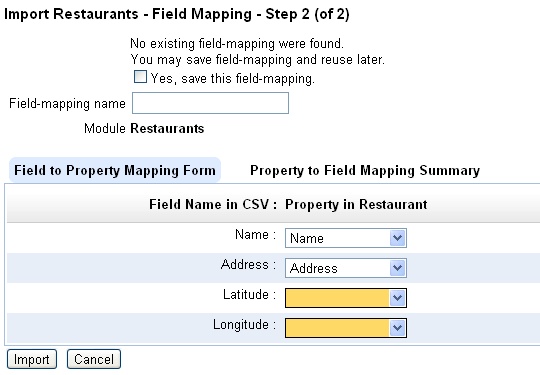
Now provide the mapping for the latitude and longitude, with both being mapped to Address on Map attribute..
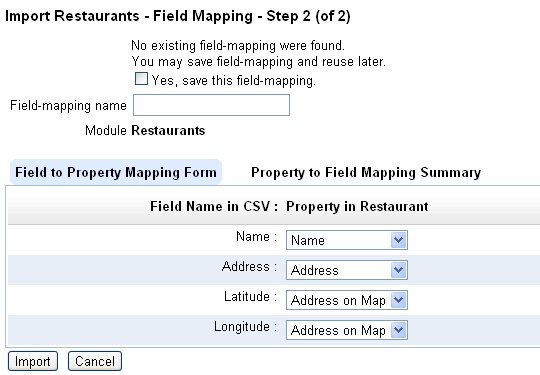
The reverse mapping shows that both the latitude and longitude fields will be combined together for the geo-location value to be stored in Address on Map attribute..
Proceed to import all data into the database. The resulting list view after upload will be like given below..

And the map view (when you click on the View Map link below the table list) will be like given below..

Step 5.2 : Create custom views to filter based on geo-location . (optional)
You can also create multiple custom views to filter data based on nearness criteria.For example, following are the entries to create a custom view to find stores near Miami Beach, Florida..
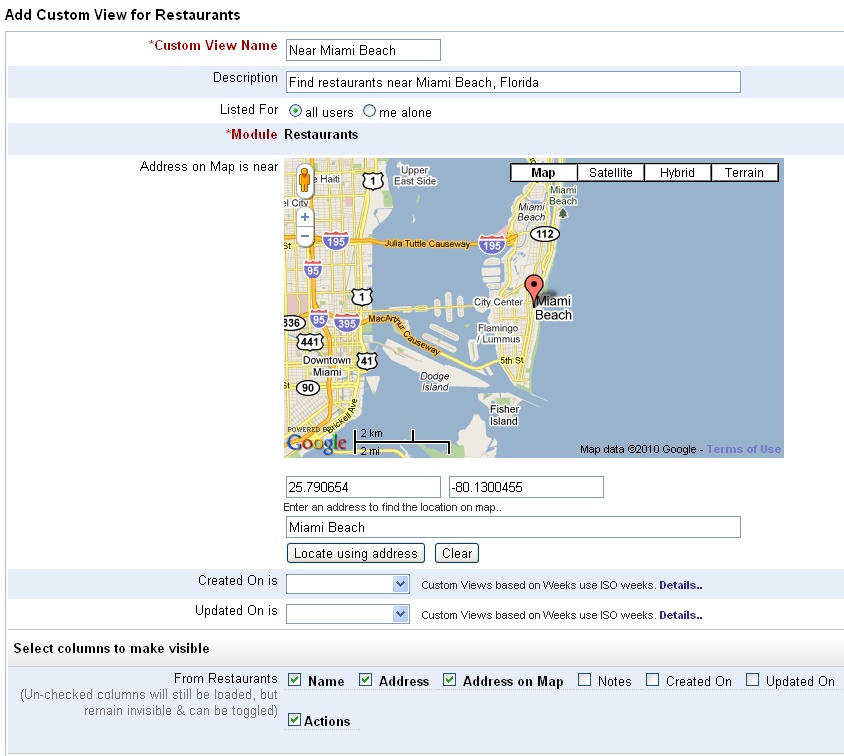 One can provide an approximate address and automatically have the marker placed in that location. Also notice that I have modified the columns that are to be displayed in the list view.
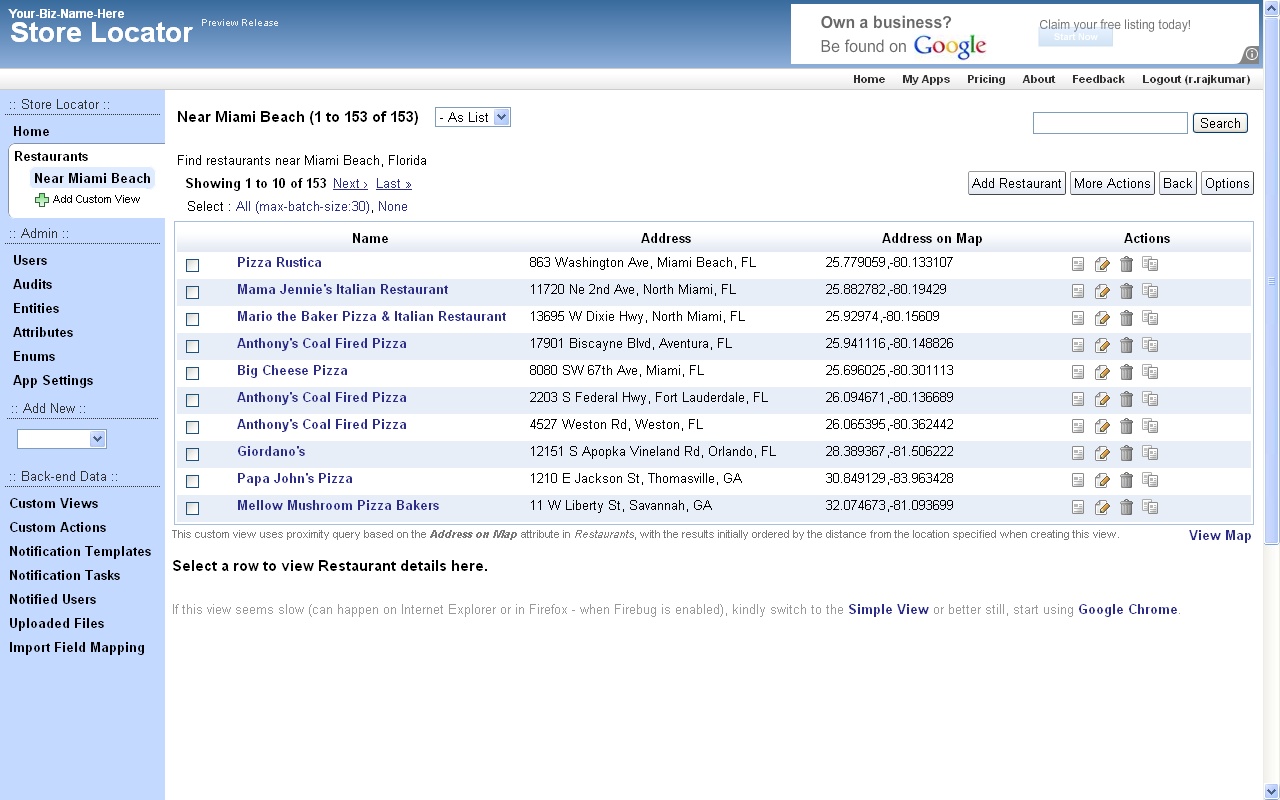
After saving the view, the resultant list view will be something like given below, with the records sorted based on the nearness to the location we specified when creating the custom view (that is, near Miami Beach, Florida)..
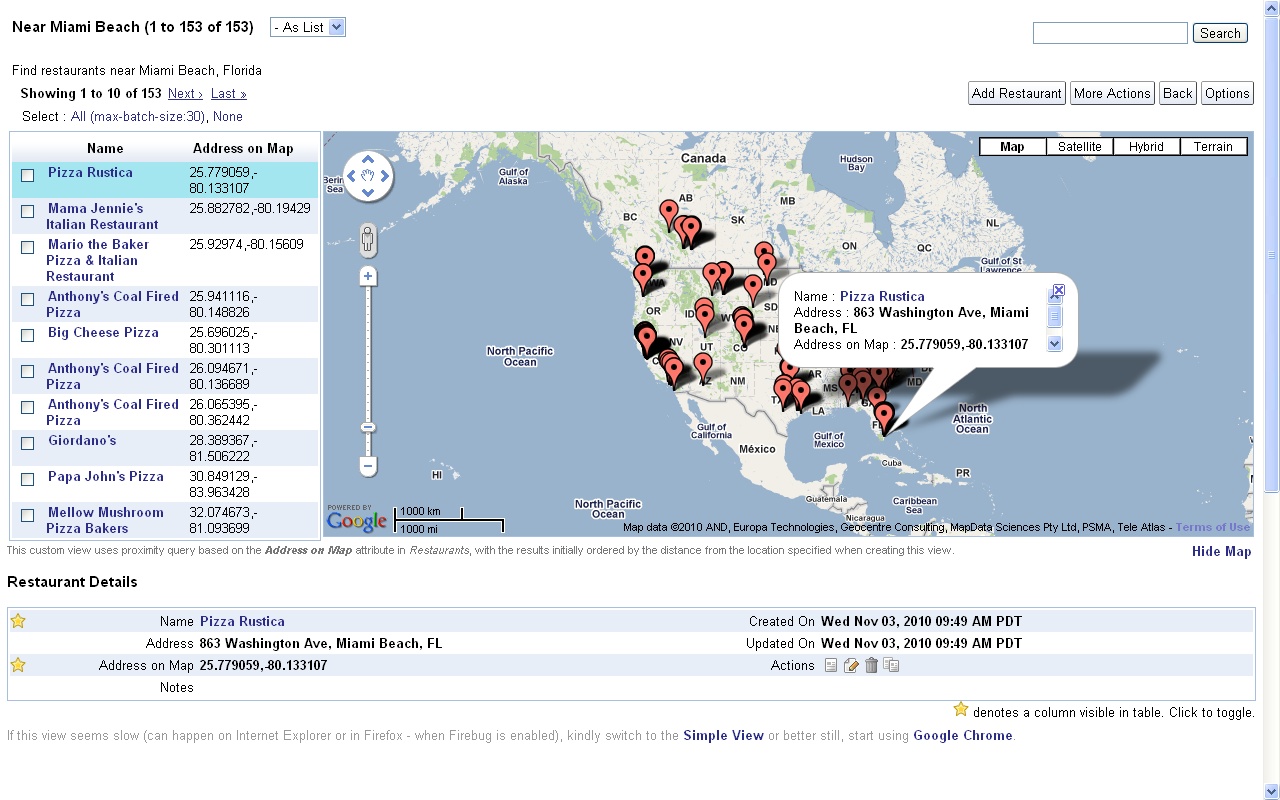
And the corresponding map view will be like the one given below..
You can also do a quick search without having to create a custom views, by following the links from the details page, to find other records near a particular location.
Hope you like the new geo-location and Google Maps integration features. Do let us know your feedback.
THIS IS MOST USEFUL FOR ONLINE DATA COLLECTION
ReplyDelete